Adding New Blog Posts
Adding A New Blog Post
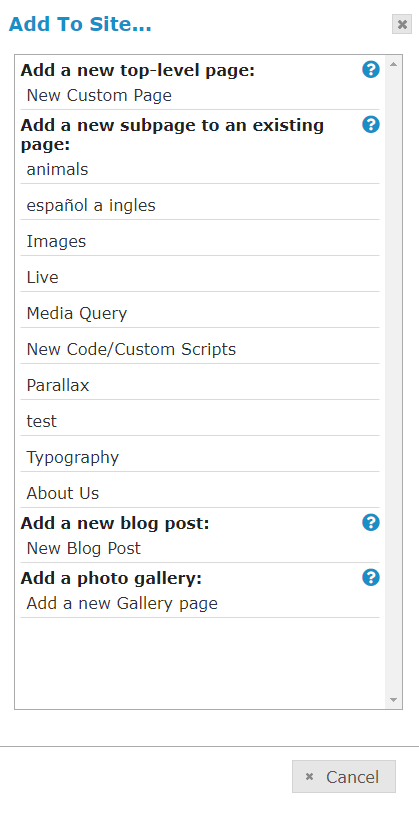
Under Add To Site in your Toolbar, you will see Add A New Blog Post. Here you can add a new blog post to your website.

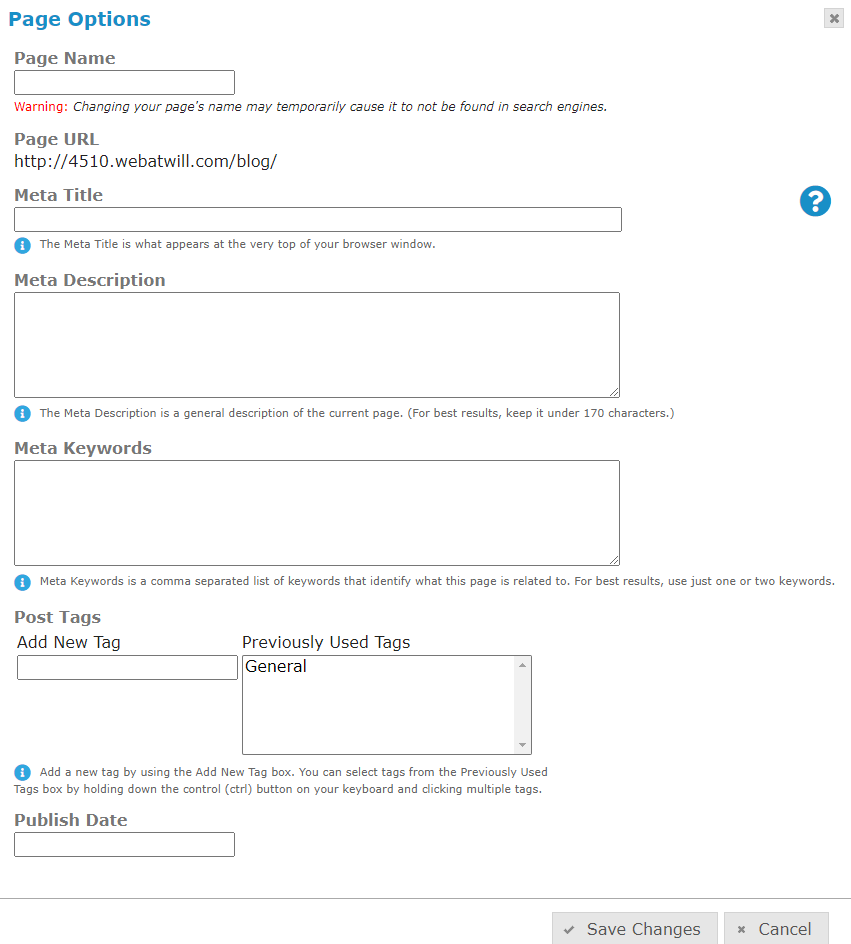
After clicking Add A New Blog Post, you will be taken to the Page Options window where you can enter information about your blog post page. More information on this can be found in Page Options.
In addition to adding a Page Name, Meta Title, Meta Description and Meta Keywords, you will also want to add Post Tags to your new post. You can add a new tag by typing it into the box next to New Tag, or click on an existing tag in the box on the right. You can always add and edit tags after you create your post.
Tags are a way to keep posts organized. By tagging posts with the same tag, you can put them into that tag’s category. For instance: You might write a post about a specific service you offer, such as a guarantee, and tag it with “guarantee.” If you write another post about this service and tag it with “guarantee” your customers can click on this tag link and see all posts about your guarantees.
If you would like to schedule your posts to publish later, choose a date under Publish Date. Posts will automatically publish on the date you select. If you do not select a date, it will publish immediately.
After entering the page information, click Save Changes to go to the next step.

You will then be presented with a new Text Block. Here you can add a title and type your blog post in the text block (Check out more information on Text Blocks). Click Add A Photo to add a photo to your blog post. Click Save Changes to save your new blog post.
On your new blog post page, you will see your most recently published post appear at the top of the page. Any tags you chose for your post will appear next. A comment box is also added to the page automatically, so users can add their own comments. We have also added a blog navigation bar at the bottom where visitors can view Recent Posts, Related Posts, and Blog Tags.
Adding/Editing Tags After A Post Is Published
First, make sure you are on the blog post your would like to edit. Click Page Options in your Toolbar. Here you can add a new tag, or deselect any tags you do not want. Click Save Changes to save.
Are You A Funeral Home?
When you are adding a new obituary to your site, you will use the same procedure as the Add A New Blog Post steps above, but you will tag your posts a little different. It’s important to tag them correctly for ease of navigation.
To tag an obituary post, be sure to select the tag Obit from the Previously Used Tags box. You should also add a new tag of Month and Year, or if it already exists, press and hold the control button (Ctrl) on your keyboard to select both.
Each new obituary should have at least 2 tags: Obit, and Month 20__.